Getting Started with Aider
Learn how to use Aider for AI-assisted coding
Supercharge Your Development with Aider – A Step-by-Step Guide
If you've ever found yourself buried under debugging tasks or iterative development challenges, Aider might just be the tool you need to reclaim your productivity. Aider is a code-centric AI assistant that integrates seamlessly with your workflow, helping you make incremental changes, debug issues, and improve your codebase.
Unlike traditional IDE plugins, Aider emphasizes context isolation, allowing you to focus the AI's attention on specific files or areas of concern.
In this introductory guide, we’ll show you how to use Aider in basic "code" mode to improve a real-world project, Meeting Buddy, using its /add, /drop, and /run commands. Screenshots will illustrate these steps, and we'll link to the Spillwave YouTube channel for video demonstrations.
Step 1: Setting Up Aider
- Install Aider
Follow the instructions on the Aider website to install the tool. Ensure you have API keys for supported LLMs like OpenAI, Claude, or others. Aider supports multiple models, including local options like Mistral and Qwen.
This involves having a python environment with the Aider package installed, even if your project is not python! Alternatively of course you can install Aider in your root Python environment and run Aider from there.
- Initialize or Use Your Repository
Open your project directory in a terminal and ensure it’s a Git repository. Aider integrates with Git to provide diffs for every change it makes.
Step 2: Identifying Your Problem
In our case, Meeting Buddy was experiencing:
- WebSocket crashes during final summarization.
- Incorrect handling of audio streams due to conflicts between the input device and PyAudio.
Before starting Aider, commit any pending changes to ensure a clean working state.
Step 3: Adding Context with /add
Aider works best when you narrow its focus. Use the /add command to include files relevant to the issue. For example:
/add service.py

/add home.py
This ensures Aider only considers these files when processing your queries.
Step 4: Describe the Problem
Next, clearly articulate your issue. For example:
The final summarization doesn’t appear to be working. The summary isn’t sent to the UI, and the WebSocket crashes.
Aider will analyze your code and suggest a solution, generating a Git diff. Review the proposed changes before applying them.
Step 5: Testing Changes with /run
You can use your IDE, and in the case of Meeting Buddy, being a multi-service app, this is often the right path. In other cases, such as a unit test, or single-executable project - after applying changes, use /run to execute the relevant part of your code. For example, if you’re testing the transcription service:
/run start_service
This ensures immediate feedback on whether the changes resolved your issue.
Step 6: Iterative Improvements
If the initial changes don’t fully solve the problem, refine your queries. For instance:
Could the WebSocket crash be due to an invalid state? Please improve logging to identify the root cause.
Aider can iterate on its suggestions, improving error handling, adding logging, or debugging logic.
Step 7: Dropping Unneeded Context with /drop
To avoid confusion, remove irrelevant files from the context using:
/drop transcribe.py
This ensures Aider stays focused and reduces the cost of LLM interactions.
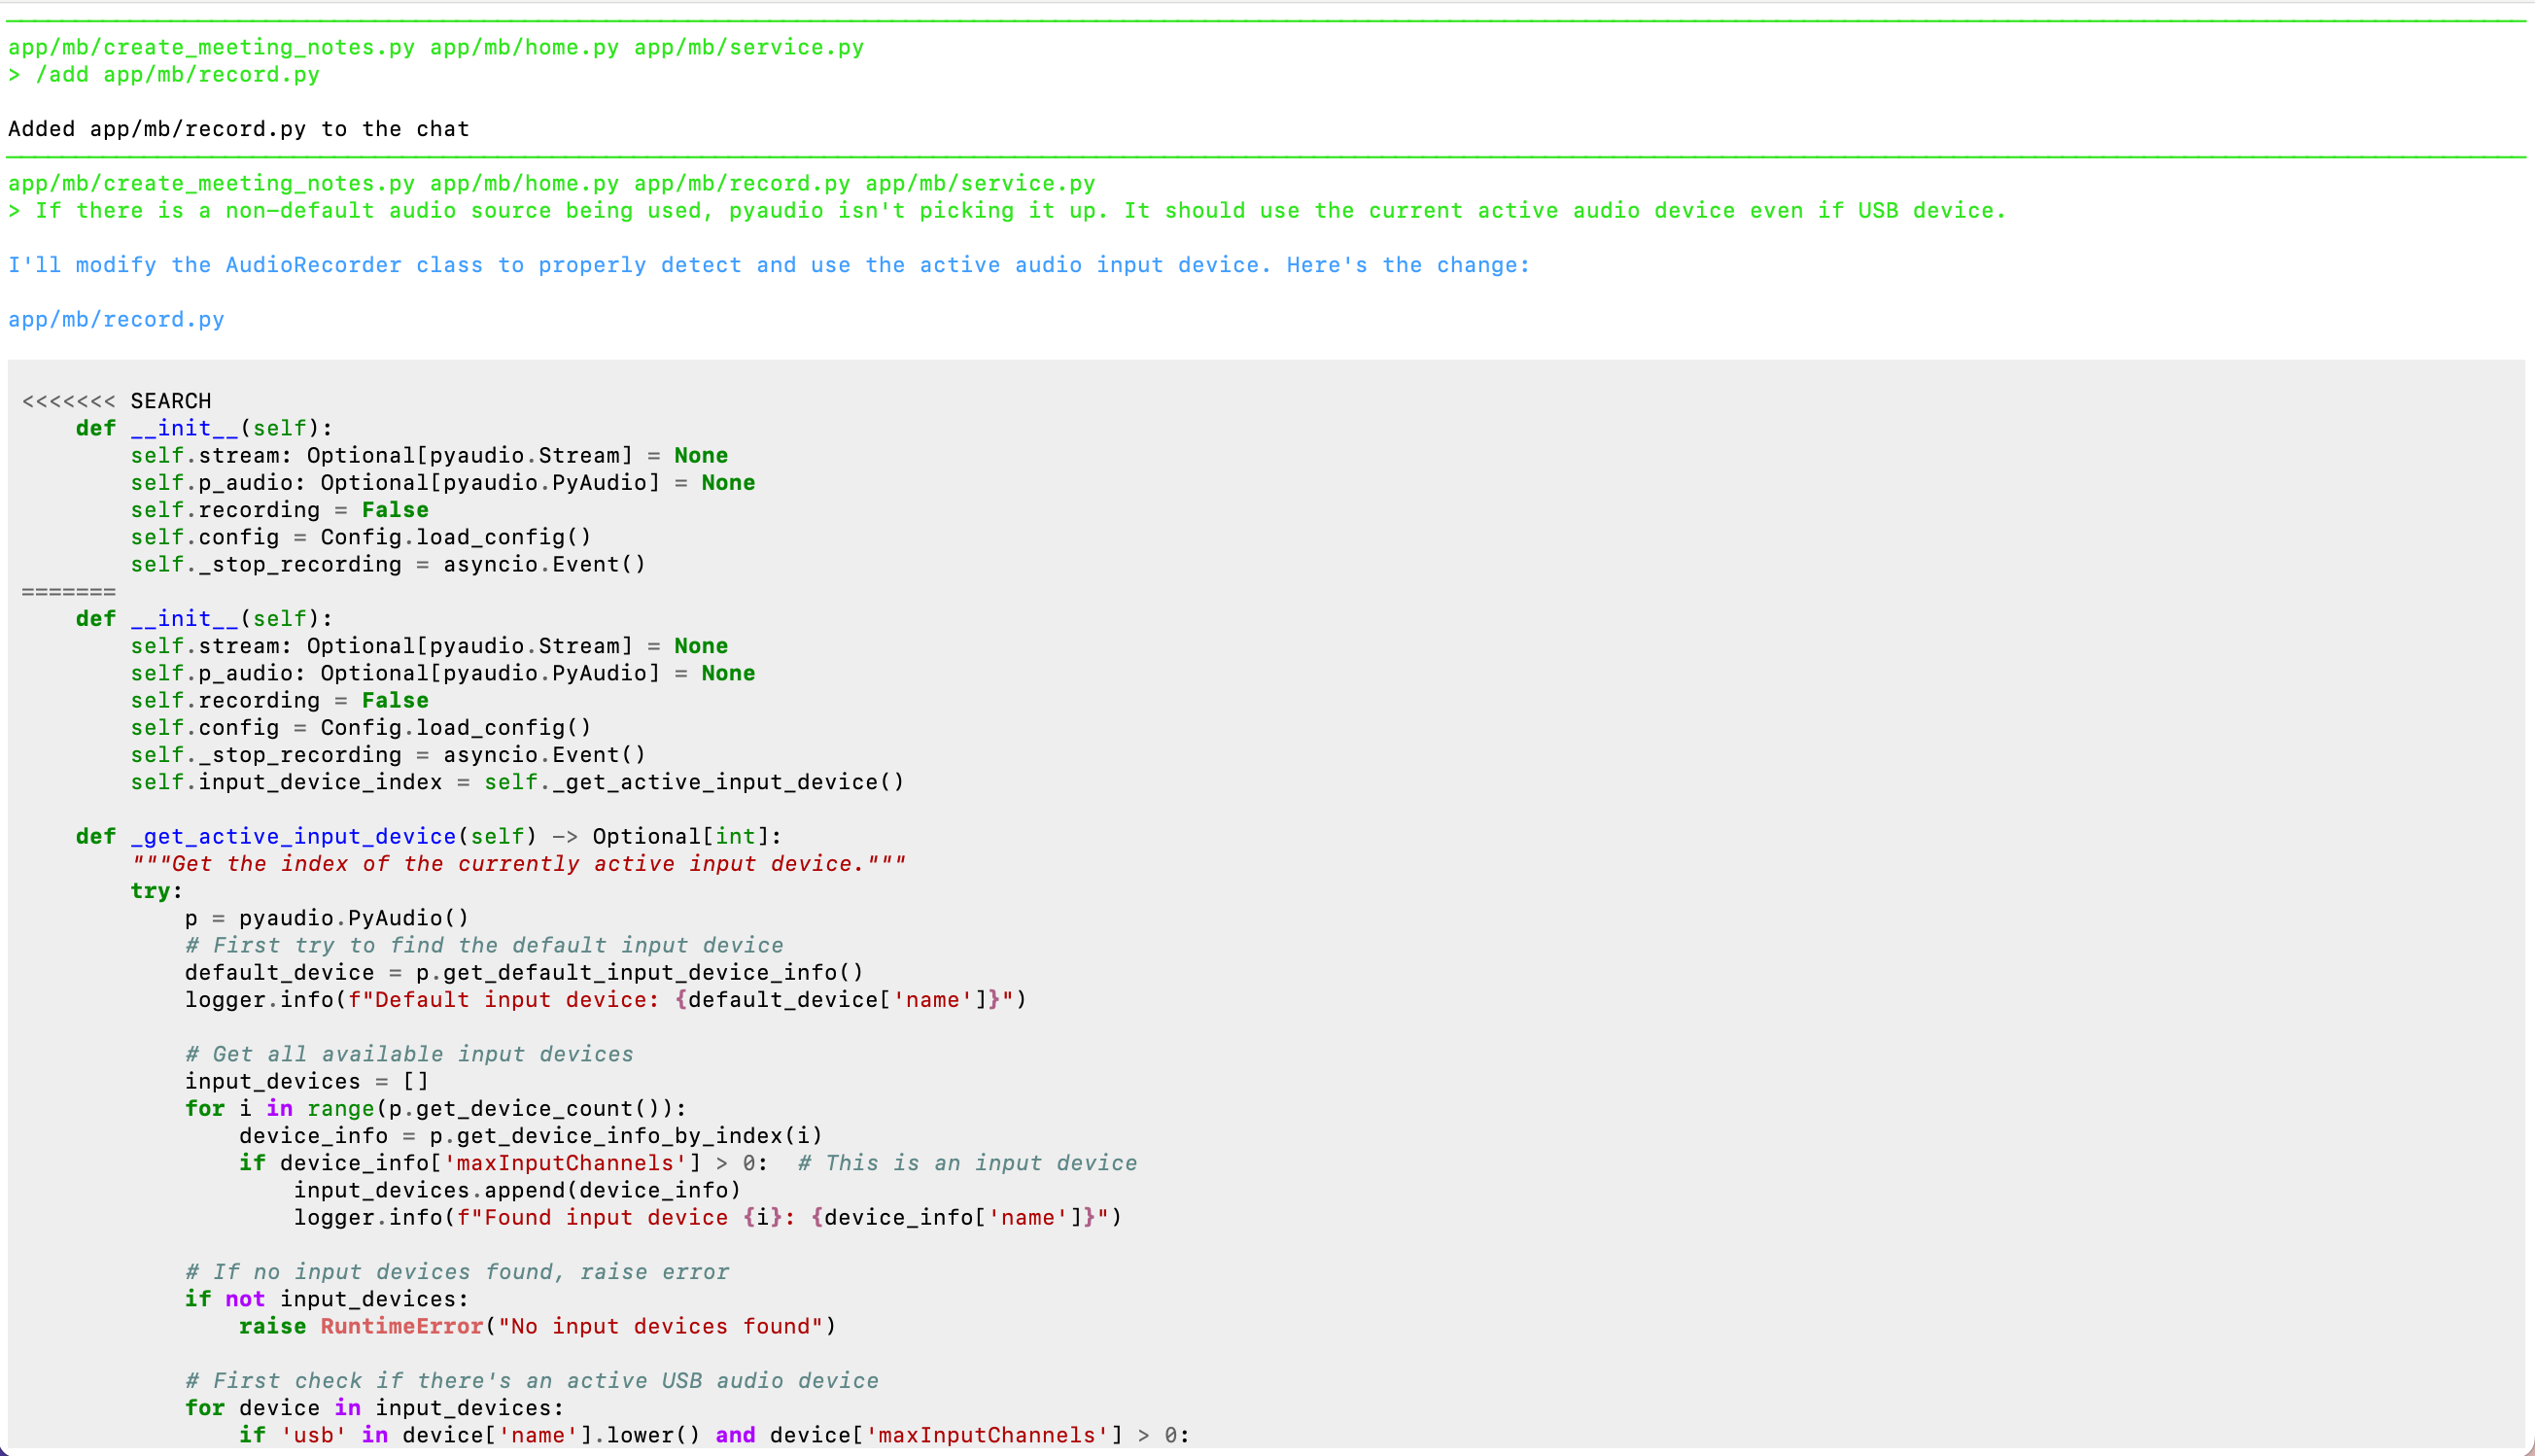
Real-Life Example: Fixing Audio Device Detection
In our Meeting Buddy project, PyAudio failed to capture audio from the correct input device because I had a USB input mic and wasn’t using the system-default audio. Using Aider, we:
- Added the relevant file:
/add record.py
- Asked:
If there is a non-default audio source being used, PyAudio isn’t picking it up. Please detect and use the active device.
- Aider generated code to enumerate available audio devices, detect the active one, and use the correct channel for recording.
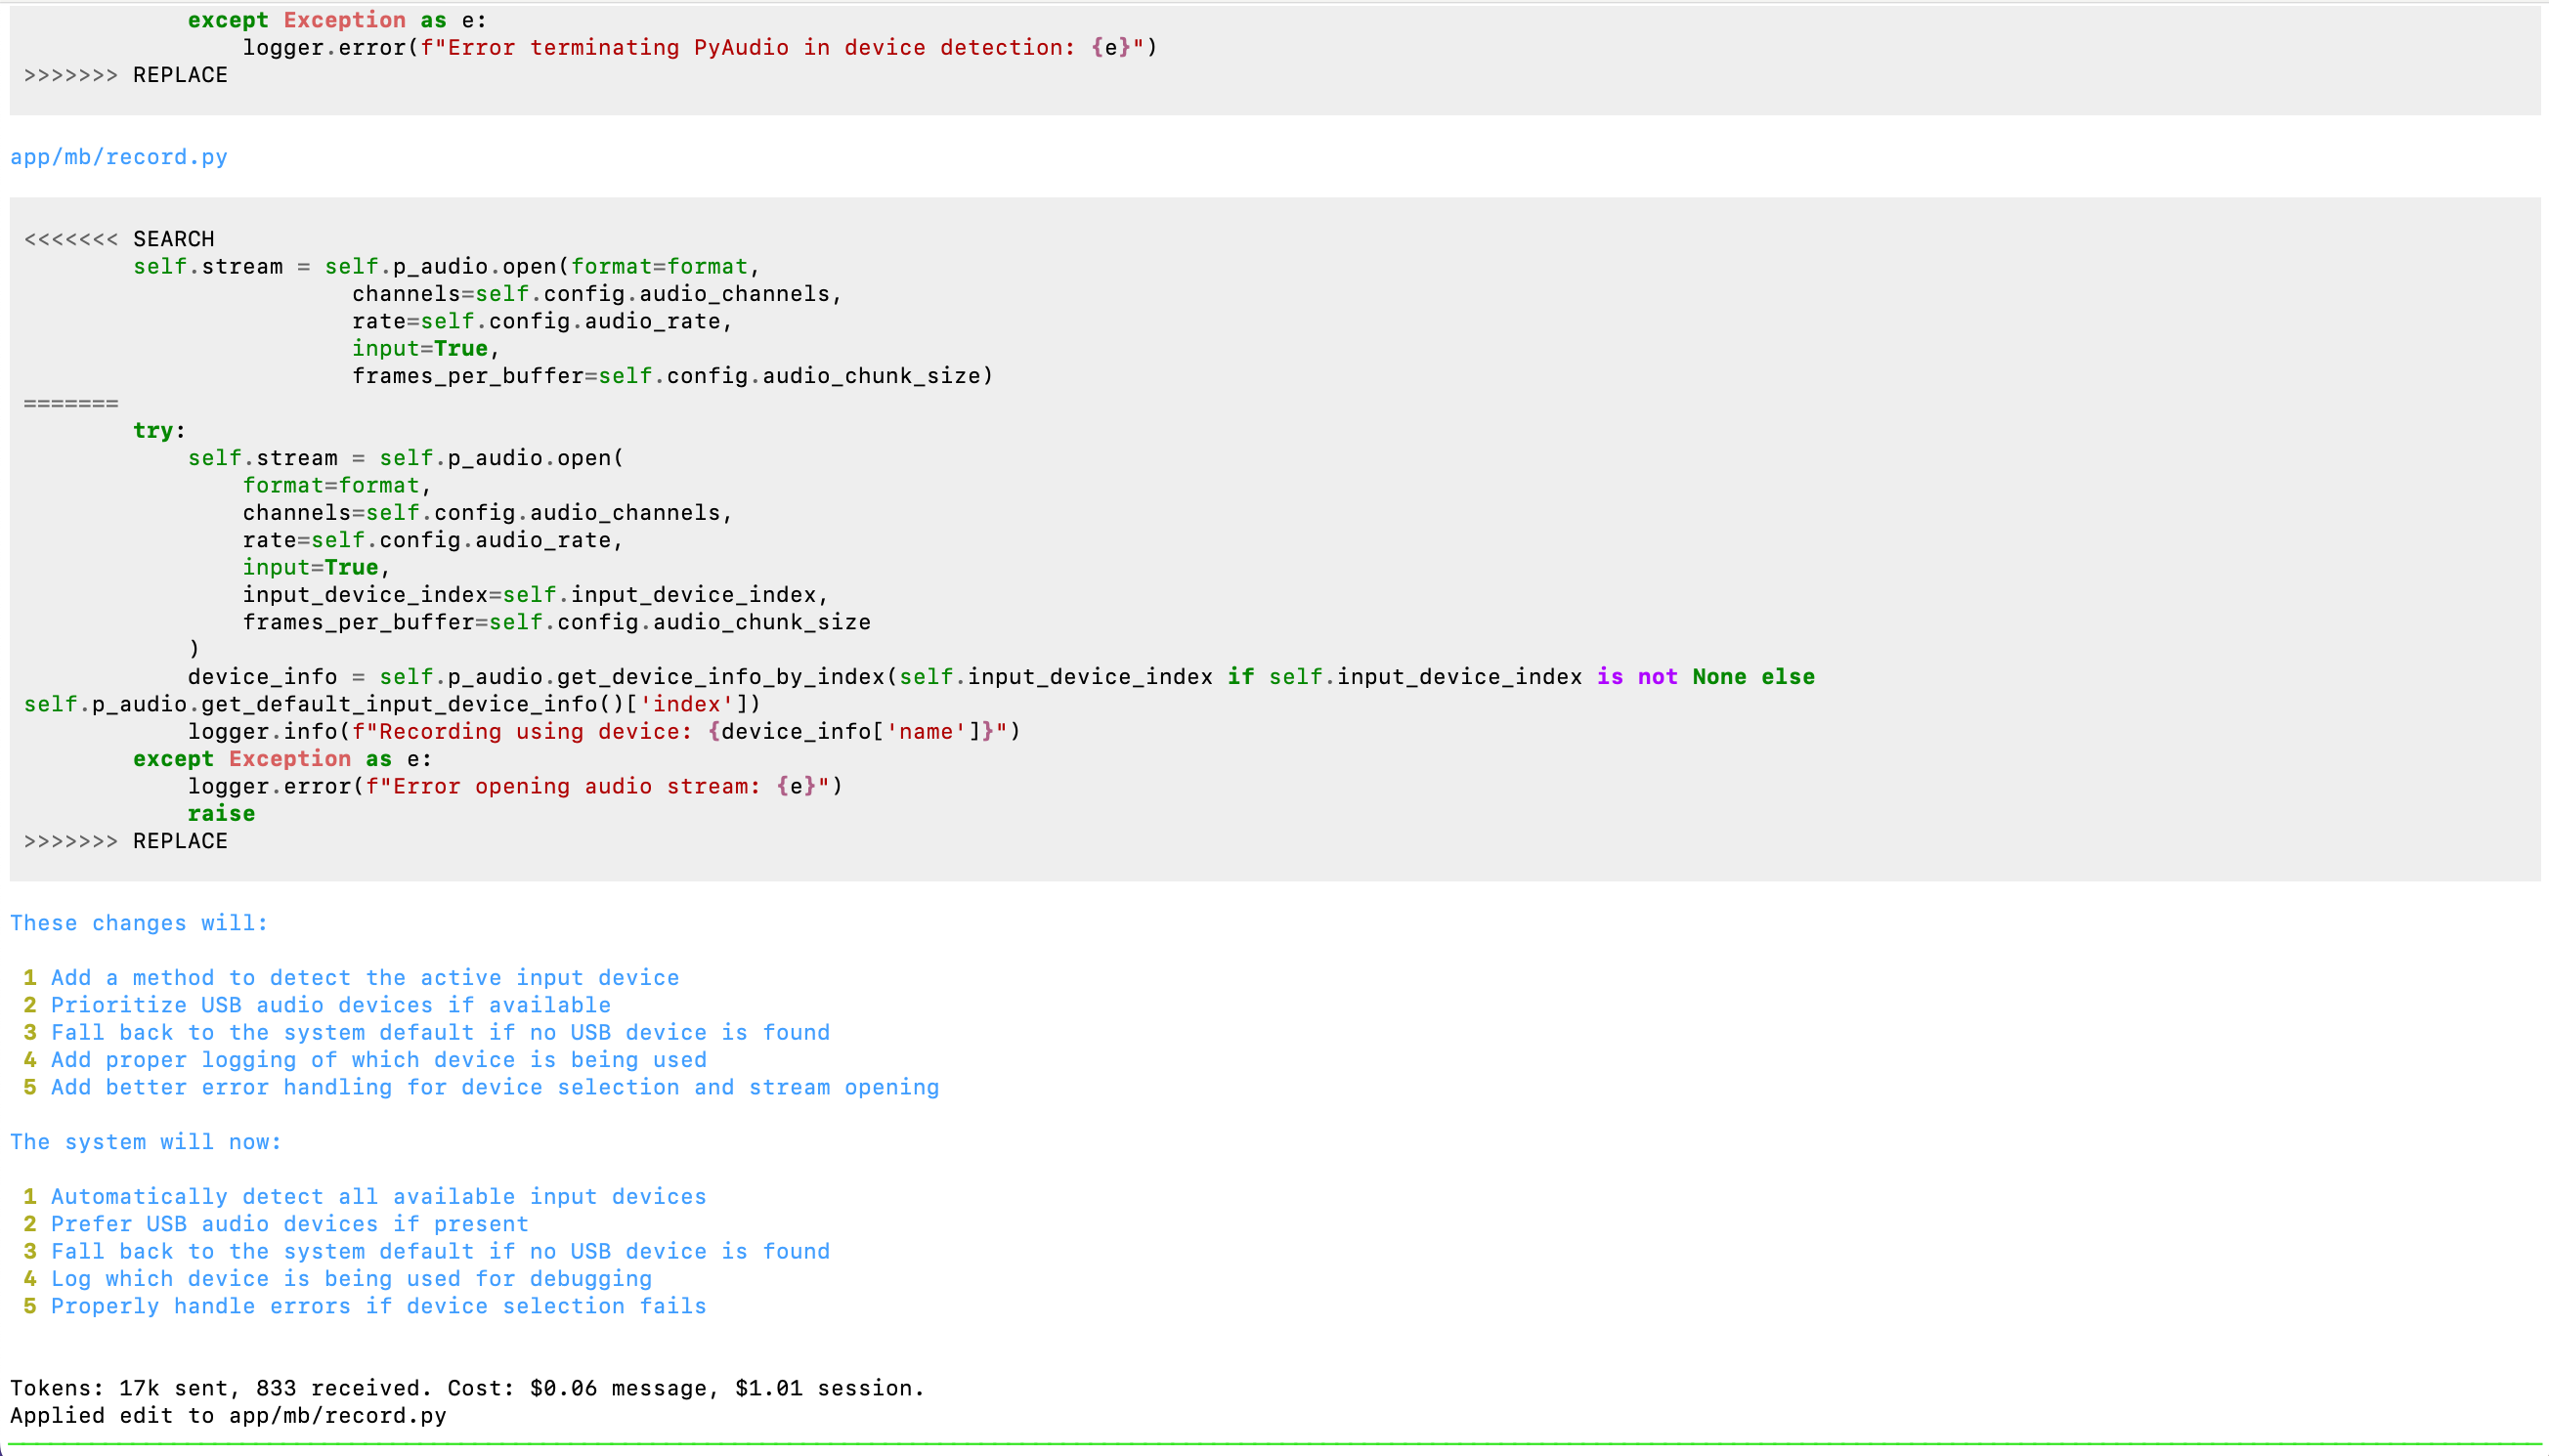
This change worked beautifully, and the correct audio device was finally used!
Key Features of Aider
-
Git Integration: Every change is returned as a Git diff, making it easy to track and review updates.
-
Customizable Models: Switch between OpenAI, Claude, Mistral, and more depending on your needs and budget.
-
Context Isolation: Focus the AI’s attention on specific files or queries to improve relevance.
-
Fast Iterations: Ideal for debugging, refactoring, and incremental development.
Why Aider Stands Out
While other tools attempt to provide global context, Aider narrows the focus to what truly matters. This often leads to faster and more accurate results. Its ability to generate Git diffs and support multiple LLMs also makes it a powerhouse for pair programming.
Conclusion
Using Aider in our Meeting Buddy project drastically improved our workflow. We resolved complex issues like WebSocket crashes, refined audio handling, and enhanced logging, all while saving hours of manual debugging. For anyone looking to boost their development process, Aider is a game-changer.
Check out the Spillwave YouTube channel for in-depth video guides, and visit Aider to try it yourself!